As you may be aware, especially if you keep up with travel trends, most countries are moving to an e-visa or an ETA program to simplify travel to their country.
What is an e-visa or an ETA?
e-visa’s are just what you might expect; an electronic visa.
An ETA is an electronic travel authority. It is something that you apply for online before you travel that will make it much easier to get into that country.
Kenya is now in the process of following that trend. They are not there yet, but here is the most recent info from Kenya.
You can use the link, or just read below since I have pasted the text of the press release below:
MINISTRY OF INTERIOR AND NATIONAL ADMINISTRATION
STATE DEPARTMENT FOR IMMIGRATION & CITIZEN SERVICES
OFFICE OF THE PRINCIPAL SECRETARY
PRESS STATEMENT JAN 7, 2024
UPDATE ON THE STATUS OF THE ELECTRONIC TRAVEL AUTHORISATION (ETA)
To boost tourism and attract more foreign investments to Kenya, the Government removed all visa requirements for all foreign nationals visiting and transiting through Kenya from January 2024.
This decision reflects our commitment to the promotion of an open, accessible and inclusive tourism and investment environment. The vacated visa requirements have been replaced by the Electronic Travel Authorization (ETA) system. This is designed for visa-exempt foreign nationals traveling to or transiting through our country, especially by air.
So far 9787 ETA applications have been received on https://www.etakenya.go.ke ke. Of these, 4046 have already been processed while the others are undergoing review on priority basis guided by the travel schedule submitted by each applicant.
The introduction of ETA is premised on the need to have a fair, faster and reliable system that also addresses Kenya’s security and other strategic interests. Before ETA, citizens from 51 countries enjoyed visa-free entry to Kenya, while travelers from 155 other countries were subject to a visa application process at a cost of $50.
ETA has introduced significant changes to the travel and transit experience for foreign nationals visiting Kenya in four fundamental ways:
1. Equal Treatment and Reduced Fees. The entry requirements and applicable payments for all foreign nationals, except for East African Community (EAC) citizens, will now be the same irrespective of the country of origin. The visa fee was $50 while the ETA fee for all is $30, thereby ensuring fairness and equality.
2. Advance Passengers Information. Previously, travelers from 51 countries were not required to fill out any forms on personal and relevant travel details. There was therefore no means of obtaining data to inform critical decisions and plans around security, infrastructure and insurance needs. With the introduction of the ETA, we now have comprehensive data on all visitors, significantly improving our ability to ensure the safety and well-being of both our visitors and citizens.
3. Reduced Processing Time. Compared to visa application, ETA provides for a simple and faster process. Previously, it took up to 14 days to process visa applications for foreigners from 12 listed countries. The waiting period for this category has now been drastically reduced to a maximum of 72 hours.
4. Dedicated ETA Desk. To guarantee a seamless experience, we have introduced a 24-hour service desk dedicated to ETA. This will ensure clients are promptly attended to irrespective of the hour while also taking into consideration the different time zones across the world. We will continue to review and refine the ETA system to align it with our clients’ convenience and to support our commitment to make Kenya a natural home for visitors and investors. With ETA system now in place, we are proud to declare to the world: ‘Welcome Home!’
Amb. (Prof.) Julius K. Bitok, MBS
PRINCIPAL SECRETARY
When you travel to an international destination, especially if you travel from a smaller airport, you will discover that you are always routed through a larger airport on your return so that you can go through Customs and Border Protection(CBP). Now, it is true that you usually cannot fly to international destinations from your smaller airport, but you can still save time upon your return by being able to avoid the CBP hassle upon your return.
Customs and Border Protection (CBP) Preclearance is the strategic stationing of CBP personnel at designated foreign airports to inspect travelers prior to boarding U.S.-bound flights. With Preclearance, travelers then bypass CBP and Transportation Security Administration (TSA) inspections upon U.S. arrival and proceed directly to their connecting flight or destination. These airports also allow you to use your Global Entry identification number to make it through the check-in process more quickly. Also, keep in mind that you will want to get to the airport a little earlier on your trip home to go through the preclearance.
As of December 2023, CBP has staff stationed at 15 Preclearance locations in 6 countries:
Dublin and Shannon in Ireland
Aruba
Bermuda
Abu Dhabi in the United Arab Emirates
Nassau in the Bahamas
Calgary, Toronto, Edmonton, Halifax, Montreal, Ottawa, Vancouver, Victoria, and Winnipeg in Canada
I did not know about this program when we traveled to Calgary in 2021 and was quite surprised that we did not have to go through CBP upon landing in the US. After a little research, I discovered the magic that saved us time at the end of a long travel day.
Keep in mind that the time saved is great, but putting the extra hassle at the beginning of your return trip means that after a long and tiring flight, especially if you don’t sleep well on an airplane, means that you get out of the airport sooner to get home to your own bed for a good night’s sleep.
The real question has to do with the convenience of travelling through one of the above airports if you are going beyond those destinations. For example, is it worth the effort to fly through Dublin to visit South Africa.
Generally when we travel to Africa, we travel through London Heathrow to break up the trip as well as to spend a few days in London. But, London Heathrow does not have preclearance and Dublin does and we would love to spend more time visiting Ireland. So, as noted above, is it more expensive to fly through Dublin vs flying through London to get to South Africa.
When I checked in December 2023 for a trip to Africa during the Emerald Season in May 2024, the round trip from Sacramento was priced between $2250 and $2750 per person for economy plus. Those flights went through various European airports, but not Dublin. The round trip from Sacramento to Dublin was about $1600 per person and the round trip from Dublin to South Africa was about $1500. That means that it would have cost about $400-$800 more per person to fly via Dublin.
These days, almost everyone who travels a lot has Pre-Check or Global Entry or some other program that gives you a Known Traveler Number (KTN).
Here are a few things to keep in mind.
When you book travel make sure that you put your KTN into your airline’s system to speed your processing during check-in as well as upon your return to the USA. Also, make sure that you add that as well as your passport info in your name as well as your frequent travel partner. Otherwise, you may get Pre-Check and your partner won’t. Your partner won’t be happy with you when they find out that it was all your fault.
If you are like me, you got your Pre-Check first, then later because of expanding to international travel, took the time and effort to get your Global Entry Card. We could not get an interview in our area so we set it up to do the interview in Alabama on a trip to visit family.
You can also get a KTN by applying thru through Nexus, Sentri. You don’t need all 4, just do Global Entry.
With having more than one type of program available, what numbers do you inter for your KTN?
If you only have Pre-Check, you enter that number. Generally it starts with a TT followed by numbers and letters. Once you obtain your Global Entry number, don’t use your Pre-Check number. In fact, go to all of your airline apps and change your Pre-Check number to your Global Entry number. They still call it your Known Traveler Number on every airline website that I have used.
If you have upgraded to Global Entry, use that number and quit using your Pre-Check number. Your Global Entry number is 9 numbers and generally it starts with a 15 or 98 or 99. You can find the number on the back of your card if you ever received a card. Forget about the two letters and three numbers that you may see showing after the 9 numbers. I don’t know what they are, but the are not a part of the KTN that you need.
Finally, you don’t need to carry your Global Entry card unless you are returning to the US from Canada. They will ask to see it.
Also, you will not get a notification to update or renew your Global Entry membership. So, go back and find the date that you received it and put a note in your calendar, a couple of months prior to the 5 year expiration date, to log in to do a renewal. Do your renewal at https://ttp.cbp.dhs.gov. It will show you your KTN and the expiration date. You can renew it up to 1 year in advance if you wish, but no earlier. Before you renew, you may consider getting a credit card that will pay for your renewal. Get one that also gives you Priority Pass access to the lounges that you will want to visit during those long layovers. I use my Hilton Honors card from American Express. Not only do I enjoy the Priority Pass access to the lounges, I also enjoy the reduced car insurance when I travel to Mexico. My last trip to Cabo, using that card, saved me over $500 on car insurance but also allowed me to use the VIP lounge in Cabo before our trip home. A lot of people use the Chase Sapphire Reserve card for the same type of benefits.
On a similar subject, for those of you who don’t travel internationally very often and chose to stay with Pre-Check, you have another option for your return from your infrequent travels abroad if you return to a major port of entry. That app was called Mobile Passport when it first came out. It was changed to Airside Mobile Passport but it has changed again in February 2022 to CBP MPC which is short for Customs & Border Protection Mobile Passport Control. You often have a line as short or shorter than what you will see for Global Entry, but like I noted, it is not available at every airport or port of entry. Currently only 31 airports and 4 shipping ports. When we returned from Cabo recently, I was telling some of the people in line to board the flight about this App. Unfortunately, we were flying back to the US on Southwest Airlines by way of the John Wayne International Airport in Santa Anna (SNA). If we were entering via PHX, LAX, OAK, SAN, SFO, SJC or SMF, they could have used this App and saved waiting in line with a couple hundred other folks. Keep that in mind when booking your flights if you can use this App.
———————————————————————-
Turning Dreams into Memories,
One Vacation at a Time.
Bon Voyage!!!
As you might guess, this document is a compilation of information from our travels as well as from other travelers. I hope it has been of value to you. Check out the important links below.
For the past 2 years, most of us did not do much in the way of international travel because of the COVID-19 restrictions. However, we did manage a 2-week trip to Alberta, Canada last year. I can fully recommend a trip to Calgary. We stayed in Canmore which is just a few miles from Banff. Beautiful place to visit.
Now that most countries are allowing travel, you need to know as much as possible regarding entry requirements for the countries you are visiting or transiting through. It was time for us to dust off our 2020-planned trip to Zambia for another safari.
It is pretty clear that the U.S. still requires an antigen test and in fact, requires you to obtain it one day before you board your airplane to come home. Not a problem since they are available almost everywhere. I had already located the lab in Lusaka, Zambia where we could get the test. That meant staying an extra night in Zambia since their website still said that it would take 24 hours for the results when everywhere else only took 20 minutes; but that was ok. I also discovered that it would be cheaper to do the test at Johannesburg airport, so, at the last minute we changed our plan to get the test in Zambia and opted to get in Johannesburg. That would save us about 500 Rand (about $32 USD). Not a lot of money, but money none the less.
A Bump in the Road
Unfortunately, not every country keeps an updated website listing their requirements, or they are often vague about what you need to do. So, no matter how well you plan, you can still end up with problems like we did.
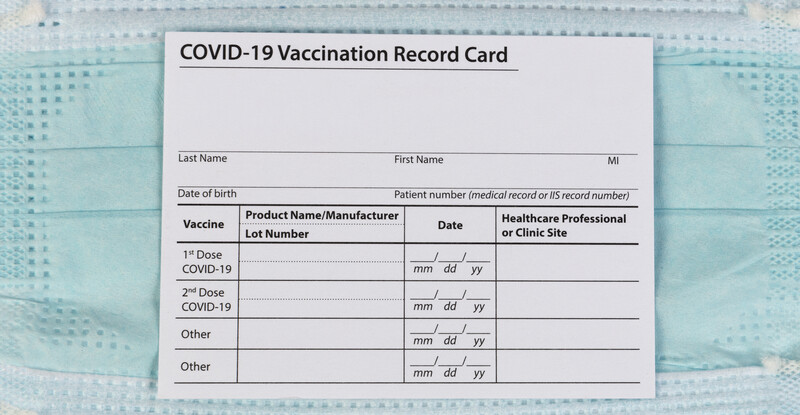
For example, our planned trip to Zambia would transit through South Africa. When we started planning the trip, both countries required us to get a PCR test 72 hours before going through their countries. In late March 2022, both countries changed their rules. As of March 22, 2022 you had to do the PCR test or to provide proof of vaccination. No where on the government websites of South Africa or Zambia noted what exactly was required for proof. Would they accept the little paper copy of a shot record from Kaiser? That is what we had in hand when we set off on our trip. All set, or so we thought. When we arrived in Johannesburg, late in the evening, they told us that our documents did not meet their requirements because they did not have the QR code, but since the unit that handles that issue was already closed, we were allowed to pass thru without any other issue. Yay!
That meant that we would need to get our vaccination records with the QR code. I did remember logging into a California website a few months earlier that provided a QR code vaccination record. To make sure that we were ready for our return trip, I logged into the California Department of Public Health, Digital COVID-19 Vaccine Record website. I completed the information and they provided our proof of vaccination with a QR code. Everything was ready to go with a copy of the document in my phone. (I am sure that your state provides a similar service.)
Are You Kidding Me?
As they say, “The best-laid plans of mice and men often go awry”. When we arrived in Johannesburg, they would not accept our State of California proof with the QR code. They did not say what they would accept, but it had to have the QR code on it. They also said that their rules had changed at 10:00 am that morning which now required their sacred vaccination record with the QR code or an antigen test. Our only alternative was to wait for 2 hours in a line of a few hundred people to get an antigen test before we could actually enter the terminal’s passport check area.
We took our test but, but they did not issue a certificate. They just taped the plastic test piece to our travel documents to enter South Africa and required us to photograph it and show the photo to the border guards. They would not give us the proof of the test. That left us with the question of “How do we get back into the U.S. without a certificate showing that we had a negative antigen test? Then, I remembered our return trip from Canada last October and that the airline only asked for the Passenger Disclosure and Attestation Form, not the test certificate signed off by the person who gave the test. With that in hand, we were ready to return to the US. Just remember that you really want to have that proof of testing in hand when you enter the US. They could always ask for it at your first port of entry as you go through passport control.
We’ll Be Ready Next Time
When we got home, I was still looking for the info needed to get the correct document with the QR code for travel to Africa. I finally found it so that you don’t have to look for it.
On that site, you fill out the info on your tests from your little vaccine record card. Then photograph it and upload it to their website. When completed, they give you the option to print the certificate with their approved QR code or email it to yourself. I have my document, but I have to say that I am not fully convinced that it will get me through the Johannesburg airport. They will probably have changed their rules before we return to Africa. Just in case, next time I will also have a PCR test before we get on the plane.
There are a couple of additional documents you may need, depending upon which country you are visiting. Both Zambia and South Africa require you to complete a Traveler Health Questionnaire before you land and to provide that document to airport staff person checking your documents. You can even fill out the PDF and bring printed copies with you.
If you were planning to travel to Mexico, I just discovered that “Starting March 2022, it will NO longer be necessary to fill out the Health Questionnaire, to fly in/out from Mexico.”
As with every trip we take, we learn something new. “Travel is broadening”; just don’t come back too broad! We’re looking forward to our next trip, next week, to Cabo San Lucas!
———————————————————————-
Turning Dreams into Memories,
One Vacation at a Time.
Bon Voyage!!!
As you might guess, this document is a compilation of information from our travels as well as from other travelers. I hope it has been of value to you. Check out the important links below.
If you are planning a trip to Europe where you will be traveling via airplanes, trains and the metro and you have never done it here at home, you may be in for a rude awakening.
Most of our trips had been by car or by car to the airport followed with a rental car or a shuttle to the hotel or resort.
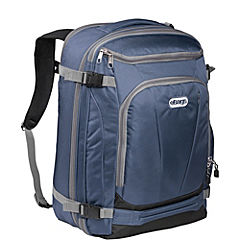
Each one of us almost always had one 24″-26″ roller bag that was checked plus a 22″ carry on plus a personal bag like a purse or computer case or book bag style backpack for personal stuff that you wanted to have handy at all times.
We were not ready for the challenge of hauling all of our suitcases up and down 2-3 flights of stairs to get from one metro train to another, nor were we really familiar with how to navigate the metro system with all of those bags.
If you are planning such a trip, I suggest that you do what I heard Rick Steves say in one of his videos(that you will find on this page). He said to pack your bags, take a short trip via train, bus and subway or metro and spend the night and return home one or two days later. You will be ready to trade in your big suitcase and learn to pack light so that you are not lugging 80 – 100 pounds of stuff with you on your European trip. You will enjoy that trim much more if you can learn to travel light.
On this trip we will start in Sacramento and spend a couple of nights in San Francisco. First, we will have a friend drop us at the Amtracktrain station in Sacramento. From there we will travel to Richmond, take the BART(our version of the Metro) to San Francisco, then walk to our hotel. We will do the Hop on-Hop off bus tour of the city, just like we were tourists, to get the lay of the land. On Saturday we will visit the great farmer’s market at the Ferry Building, then return home on Sunday.
You can try the same thing wherever you live. Do it or you will hate your self and be miserable on your European Vacation.
One of the things to think about before your trip is the process of coming home and going through Passport Control.
You have 3 options when you return to the US.
You can wait in the long line with the rest of the people.
You can use Mobile Passport to go to a shorter line.
You can get your Global Entry approval to go to the very short line.
Fortunately for those of us who have opted for number 2 or number 3, most people only take infrequent international trips and don’t know or don’t want to take the time to learn about the other options.
We don’t want to be in those lines. We may have had to suffer through them when we arrived in the foreign country on our trip, but we don’t want to do it when we’re tired after a long trip home.
The second option is using an app on your phone called Mobile Passport. We continue to use this second option while we wait for the government to get back to us. I wrote a post about Mobile Passport several months ago. You can click here to read it. The best part of this option is that it is free.
The third option is really the first choice for frequent international travelers. That would be to sign up for Global Entry Of course, that means that after your conditional approval, you will need to go to one of the very few international airports for your interview. For us, that means going to San Francisco to do the interview. A pain in the back side. Also, after you fill out the documents and pay the fee, you can still end up waiting months before you get your conditional approval. We applied in May for an October trip. Still no joy and it is already September. It does not look like we will have it for our next international trip; maybe we will have it for next year.
After you get the conditional approval, you need to sign up for the interview. Unfortunately, it could be several more months before you can go in for your interview. If you have your conditional approval, you can get an interview on the fly if you return from an international trip and land at one of the several dozen airports that allow it, you can do your interview there after you disembark. When landing in an international terminal follow the signage directing you to CBP officers who can complete your Global Entry interview during your admissibility inspection. Click here for info on that process. We hope that we at least have the conditional approval before we leave in October so that we can use this process when we return. Otherwise, it will mean a trip to San Francisco before our next big trip in 2020.
One of the nice things about Global Entry is that it includes Pre-Check. Unfortunately our Pre-Check was expiring this fall and we expected to have Global Entry in place so we were not going to renew it. Well, we had to renew it because of the long delay in getting Global Entry. That was an extra expense of $170 that we were not happy about.
Of course, there are a couple of other options. If for example all of your international travel is between the US and Canada, you may want to consider Nexus. If your travel is only to Mexico and Canada, then you should look at Sentri. These two examples may include Pre-Check too.
———————————————————————-
Turning Dreams into Memories,
One Vacation at a Time.
Bon Voyage!!!
As you might guess, this document is a compilation of information from our travels as well as from other travelers. I hope it has been of value to you. Check out the important links below.
Whenever you plan to travel internationally from the United States, you need to check to see if you need to have a visa. Many countries are on a short list that approves travelers with US Passports without a visa. Many of them who do require a visa, do not require that you get one before you leave home. You can often get one at a border crossing or at the airport.
You do need to make sure that you have adequate room in your Passport for the stamps and for most countries, you need at least 6 months left on your Passport’s expiration date to enter a foreign country.
When we went to South Africa in 2015, we got our visa online before we left home, but picked up our visa for Zambia at the airport after we landed.
When we went to Kenya and Tanzania in 2018, we needed to go online to order our mulit-visit visa for Kenya. On the other hand, we did not get our Tanzania visa before we left home. We didn’t want to send them our passports and hope we get them back before we left for our trip. Also, there is more than one type of visa to visit Tanzania. There is one for people who are transiting the country. At the time of this writing, that is about $30. For those who are visiting Tanzania, the fee is about $100. Also, they want newer, clean, crisp $20 dollar bills, or in the case of the transit visa, a couple of $5 dollar bills to go with your $20. Also, if you are with a guide, they won’t believe that you are transiting the country so make sure to have the $100 in clean cash.
Another thing to think about when we discuss getting a visa. For many years, most countries listed the United States on a short list of countries that did not have to apply for a visa to visit that country. Things are changing. Many countries, such as Canada, New Zealand and Australia, now require us to apply online for an ETA (Electronic Travel Authorization). Check the rules closely since they can vary based upon your method of travel. For example, as of September 2019, to go to Canada by air, you need an ETA, but by ship or car, you don’t need one.
You need to do this before you leave home, so don’t forget to check the countries you are visiting to make sure you are good to go.
———————————————————————-
Turning Dreams into Memories,
One Vacation at a Time.
Bon Voyage!!!
As you might guess, this document is a compilation of information from our travels as well as from other travelers. I hope it has been of value to you. Check out the important links below.
I am sure that you know that you need a passport for most international travel.I am also sure that you have heard that by October 1, 2020, you will need to have your driver’s license updated/reissued to travel stateside in compliance with the Real ID law. Of course, you could use your passport for all of your air travel, but if you don’t want to carry it for domestic travel, get your driver’s license updated if you are over 18 years of age.
Of course, each state has to set up the issuance of a Federally approved Real ID. All of them are doing it through their Department of Motor Vehicles. For my friends who live in California, here is the link to the DMV website to use to determine which of your documents will suffice to get your Real ID. As of September 2019, almost all of the states have had their version of the Real ID approved by the Feds. Click Here for more info. If you live in Oregon or one of the other states without an approved Real ID, make sure that you have your passport in order. Yes, there are a few other documents that will suffice, but whatever you do, don’t show up at an airport after October 1st without the proper ID or you won’t be allowed to fly. That could really ruin an otherwise well planned trip.
Now that we have done the extra research about Real ID, it is time to double check our passports to make sure that we have at least 6 months on our passports beyond the time we will be traveling and that we have at least 2 empty pages for passport stamps and visa stamps for each country that we are visiting.
———————————————————————-
Turning Dreams into Memories,
One Vacation at a Time.
Bon Voyage!!!
As you might guess, this document is a compilation of information from our travels as well as from other travelers. I hope it has been of value to you. Check out the important links below.
*** There have been some major updates to this program. See that info below in red.
Many of you already use TSA Precheck when traveling domestically to speed the process of boarding aircraft. You can often use at foreign international airports too.
Some of you use Global Entry for international travel to speed up the process of getting through Customs when you return to the U.S.
Did you know that there is another option to speed up the process of going through passport control when you return to the United States if you don’t have Global Entry?
It is called CPB Mobil Passport Control. No, it does not replace your passport or Global Entry, but it does replace filling out the paper form upon your return to the U.S. so that you can move more quickly through the Customs and Border Control process. Best of all, is that it’s FREE.
You can have both Global Entry and CPB Mobil Passport Control but you must decide which one you will use to enter the US. Keep in mind that if you have completed and activated your CPB Mobil Passport Control, then you have already started the passport control process and you will have to go to the CPB Mobil Passport Control line.You cannot go to the Global Entry line as they will end up sending you to a supervisor to deal with you trying to enter the country twice. That could mean quite a delay in getting through the process.
You could fill out all of the info in CPB Mobil Passport Control while on the airplane and wait until you enter the passport control room to decide to go to Global Entry or complete the process with CPB Mobil Passport Control based upon the shortest line. You will still need to wait to receive the response on your phone before getting in the line. Either way, the line will be much shorter than the very long line for those who didn’t get set up with Global Entry or CPB Mobil Passport Control before their trip.
Now, back to CPB Mobil Passport Control.
It is pretty simple. Just go to Google Play or the Apple Store to download the app, scan your passport into the app and fill out some info. You can put your whole household on one phone. I would suggest that you do it on your phone as well as your partner’s phone, just in case one of the phones is lost or damaged on your trip. The info will be held on your phone and it is password protected.
When you return to the U.S., turn on your phone and use the app to answer the questions that you would have answered on the paper form that the flight attendant may have given you. You will receive a QR code to be scanned by the Customs and Border Protection system.
It is pretty straight-forward. In fact, after you have landed and are headed to the terminal on the taxi way, just turn on your phone, open the app and answer the questions. You will probably have your QR code before you get off the plane and you will be ready to go. The info is good for 4 hours. Make sure you do this before you start responding to your emails or you may not get the QR code response before you get to Passport Control. Remember, you cannot go to the Global Entry line after you have sent your info to Customs and Border Control with your CPB Mobile Passport Control as they will end up sending you to a supervisor to deal with you trying to enter the country twice. That could mean quite a delay in getting through the process.
It was only available originally 24 airports and one cruise terminal.
Updated Info:
TheMobile Passportwas changed to Airside Mobile Passport but it has changed again in February 2022 to CBP MPC which is short forCustoms & Border Protection Mobile Passport Control. You often have a line as short or shorter than what you will see for Global Entry, but like I noted, it is not available at every airport or port of entry. Currently only 31 airports and 4 shipping ports.
The MPC mobile app, is available to U.S. citizens and Canadian B1/B2 citizens visitors.
MPC is currently available at the following 48 sites, including 33 U.S. International Airports, 11 Preclearance locations, and 4 seaports of entry:
Atlanta Hartsfield-Jackson International Airport (ATL)
Aruba Queen Beatrix International Airport (AUA)
Bermuda L.F. Wade International Airport (BDA)
Baltimore/Washington International Thurgood Marshall Airport (BWI)
Boston Logan International Airport (BOS)
Calgary International Airport (YYC)
Charlotte Douglas International Airport (CLT)
Chicago O’Hare International Airport (ORD)
Dallas/Fort Worth International Airport (DFW)
Denver International Airport (DEN)
Edmonton International Airport (YEG)
Dulles International Airport (IAD)
Fort Lauderdale-Hollywood International Airport (FLL)
Halifax Stanfield International Airport (YHZ)
Honolulu Daniel K. Inouye International Airport (HNL)
Houston George Bush Intercontinental Airport (IAH)
Houston William P. Hobby International Airport (HOU)
John F. Kennedy International Airport (JFK)
Kansas City International Airport (MCI)
Las Vegas Harry Ried International Airport (LAS)
Los Angeles International Airport (LAX)
Miami International Airport (MIA)
Miami Seaport
Minneapolis-Saint Paul International Airport (MSP)
Montreal Trudeau International Airport (YUL)
Nassau Lynden Pindling International Airport (NAS)
Newark Liberty International Airport (EWR)
Oakland International Airport (OAK)
Orlando International Airport (MCO)
Ottawa International Airport (YOW)
Palm Beach Seaport
Philadelphia International Airport (PHL)
Phoenix Sky Harbor International Airport (PHX)
Pittsburgh International Airport (PIT)
Port Everglades Seaport
Portland International Airport (PDX)
Sacramento International Airport (SMF)
Salt Lake City International Airport (SLC)
San Diego International Airport (SAN)
San Francisco International Airport (SFO)
San Jose International Airport (SJC)
San Juan Airport (SJU)
San Juan Seaport
Seattle-Tacoma International Airport (SEA)
Tampa International Airport (TPA)
Toronto Pearson International Airport (YYZ)
Vancouver International Airport (YVR)
Winnipeg James A Richardson International Airport (YWG)
Keep this limitation in mind when booking your flights if you plan to use this App. For example, don’t return to the US from Cabo via John Wayne International (SNA) in Santa Ana. You cannot use this program there yet. Better to enter the US at PHX or SAN or SFO.
Turning Dreams into Memories,
One Vacation at a Time.
Bon Voyage!!!
As you might guess, this document is a compilation of information from our travels as well as from other travelers. I hope it has been of value to you. Check out the important links below.
We are planning another trip to Africa for July 2018. This will be a 12 day photo safari in Kenya and Tanzania to see the great migration in the Masai Mara that we have seen on TV on the National Geographic Channel.
The best time is between July and August. If it is a warm year, then July is great. If not, you may want to wait until August. Of course, to plan ahead, you must decide before you really know what the weather will be, so plan it and hope for the best weather, but enjoy it either way.
Just a few dozen years ago, this would have been a very dangerous trip because of the rampant poaching. Thanks to the Mara Triangle Conservancy, that is no longer the case and we are looking forward to an exciting, but not a dangerous, trip.
For this trip, we want to do the safari during the beginning of the migration, rather than in the middle of it. We will not see as many animals, but that just means that we will see a few thousand animals rather than hundreds of thousands of animals. That being said, it will be summer in the northern hemisphere at home in California, but winter in the southern hemisphere in Africa.
Of course, we cannot fly to straight to Nairobi from the U.S. yet. Just in case you are interested, there will be a direct flight from JFK to Nairobi starting in October 2018 on Kenya Airways. It would be a very long flight, about 15 hours or so. We prefer to break our flights up into flights of 10 hours or less. Also, since we will be flying into Nairobi to start our photo safari, we need to find the best routing to and from there. Based upon my research, the best option is to fly round trip from London to Nairobi. Therefore, we will fly from California to London, and then on to Nairobi. With that in mind, we plan to add a week long visit to London on the way to Africa. We would have preferred to do 3-4 days in London on the way to and from Africa to break up the flight both ways, but it did not fit our schedule. So it will be a very long, long trip home. Probably about 36 hours of travel time. Drive from Arusha Tanzania to Nairobi, Kenya, then fly Nairobi to London, layover, London to Dallas, layover, and finally Dallas to Sacramento.
Now that you have seen our general plans, what should you be doing to get ready if this was your trip. You could call your travel agent and describe the trip you wish to take and let the agent gather the appropriate information that is needed to set up the trip. Keep in mind that you should plan on paying the agent for doing all the work to put the trip together. If you don’t want to do that, then it is time for you to do some work to gather all of the info needed to set up your timeline for the various steps along the way.
What about shots??? Depending upon where in Kenya or Tanzania you will be visiting, the shot requirement is different. Make sure to talk with your travel nurse for updated info.
You are probably are thinking that you have a passport and don’t need to worry about that. Did you know that some countries won’t let you visit if you have only a couple of months left on your passport? Did you know that some countries won’t let you enter if you have a brand new passport? Did you know that some countries require you to have several blank passport and visa pages available for them to use. So, do your homework. I could tell you what I found for Kenya and Tanzania, but since that information does change and I have no idea when you will be reading this post, I suggest that you do your own research.
While you are on the State Department’s website, you will see links for Travel Advisories, passports and international travel. We will start on the International Travel page. On that page, click on the Traveler’s Checklist link and go through their checklist. The first thing they say to do is to research the entry/exit requirements for the countries you will be visiting. For example, we will visit Kenya and Tanzania. You can click on them to see what issues to be concerned about. Another thing to remember is that you may need to bring along your children’s birth certificates in some parts of Africa because of issues of child trafficing. So, bring their passports but bring valid copies of their birth certificates too, just in case.
Of course, the State Department recommends that you register for the Smart Traveler Enrollment Program (STEP) to receive updates if there are problems in the country where you plan to visit.
Why is this important? Because if civil war breaks out, you may want to cancel your trip. That brings up another issue, which is travel insurance. In fact, that is almost as important as the entry and exit rules for where you plan to visit. You need to talk to your travel agent about your travel insurance needs before you make any reservations. Especially if you want to be able to purchase a policy to cover you if you have pre-existing health conditions that may cause you to have to cancel the trip. Please take the time to learn more about travel insurance here. When you are ready to purchase a policy, your travel agent will handle it for you. If you are doing your own trip planning, click here to order a policy.
Now that I have done some of the needed research, I need to double check our passports to make sure that we have at least 6 months on our passports beyond the time we will be in England and Africa and that we have at least 2 empty pages for passport stamps and visa stamps. Along those same lines, we need to go online to order our mulit-visit visa for Kenya since we fly into Kenya, drive into Tanzania then back into Kenya before flying home. ***In 2024 the laws have been changed to travel to Kenya. Now they require an eVisa also called an ETA which stands for an Electronic Travel Authority. We are seeing thes popup throughout the world these days.
We will not be getting our Tanzania visa before we leave home. We don’t want to send them our passports and hope we get them back. Also, there is more than one type of visa to visit Tanzania. There is one for people who are transiting the country. At the time of this writing, that is about $30. For those who are visiting Tanzania, the fee is about $100. Also, they want newer, clean, crisp $20 dollar bills, or in the case of the transit visa, a couple of $5 dollar bills to go with your $20. Also, if you are with a guide, they won’t believe that you are transiting the country so make sure to have the $100 in clean cash.
While waiting for the visa, it is time to get started on shots. When we went a couple of years ago, we had to get a series of shots, some before the trip and a final one after we got home. So, I called Kaiser to set the appointment with the Travel Nurse to discuss what shots and meds that we may need for our trip.
Don’t forget that you need to consider the re-entry process when we return to the U.S. The first choice would be to get the Global Entry paperwork done before hand, but that means going to San Francisco to do the interview. A pain in the back side. Also, after you fill out the documents and pay the fee, you can still end up waiting months before you get your conditional approval. Additionally, after you get the conditional approval, you need that to sign up for the interview, but it could be several more months before you can go in for your interview. You can get an interview on the fly if you return from an international trip and land at one of the several dozen airports that allow it, you can do your interview there after you disembark, but before you leave the passport control area. Check with the folks at Global Entry for more info. Also, since our Pre-Check was expiring, we had to renew it because of the long delay in getting Global Entry.
The second option is using the app on your phone called Mobile Passport. I wrote about it earlier and did an uppdate here. We chose the Mobil Passport. ***This is now called the CBP-MPC which stands for Customs and Border Protection’s Mobil Passport Control.Learn more about it here from the CBP website.It is an App that you install on your phone.
Once all of that is in process, we can finally book the trip and buy the travel insurance. I will talk more about that part of it in a follow-up blog post.
Just in case you were wondering about why we are going to Kenya and Tanzania, it is so that we can see the great migration. You know, the migration of hundreds of thousands of animals that you have seen on the National Geographic Channel.
The bottom line is that we are turning more dreams into memories. You should be doing the same.
———————————————————————-
Turning Dreams into Memories,
One Vacation at a Time.
Bon Voyage!!!
As you might guess, this document is a compilation of information from our travels as well as from other travelers. I hope it has been of value to you. Check out the important links below.